As many noticed, it’s not that easy to satisfy View 5.1, specially when it comes around to the Security Server. There are plenty of blogs, which explain how it’s done for the View Connection Server or any server which has joined an Active Directory domain. This is also covered in the View 5.1 Installation Guide.
Hence this blog entry is concentrating specifically on the View Security Server, which is usually NOT joined to an Active Directory and hence there are no Certificate Enrollment Policies, which do the magic for us and configure everything correctly for our certificate request. Here is the cookbook for a custom certificate request on a standalone Windows 2008 R2 server.
For those who can’t be bothered with circumstancial step-by-step screenshots here’s a summary of the most important points, which I did wrong the first few attempts:
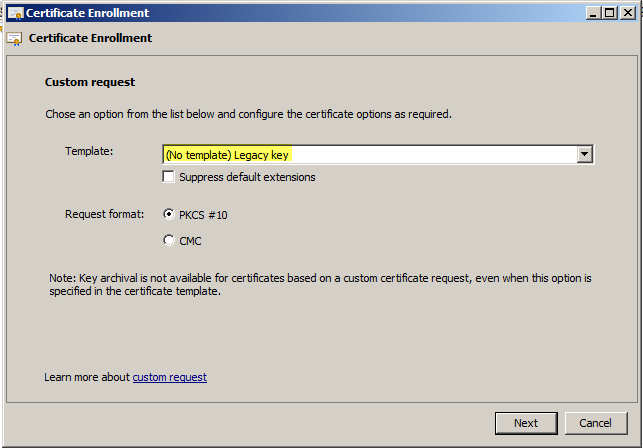
- * Use “Legacy Key” when selecting the certificate request template
- * Add the common name (FQDN) to the Subject Alternate Name (DNS field)
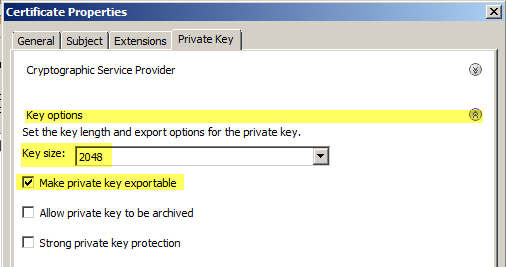
- * Mark the private key as exportable (this I actually got from the installation guide and is mentioned far and wide, but I repeat it here, because it gets missed many times)
- * For those who still have troubles, the CRL URL is probably not working and CRL checking needs to be disabled
But now, for everyone else, the deep dive:
First open the Certificate Management Snap-in, so go to “Run…” type “mmc.exe” and then add the “Certificates” snap-in, point it to the local Computer account. This is the easy part.
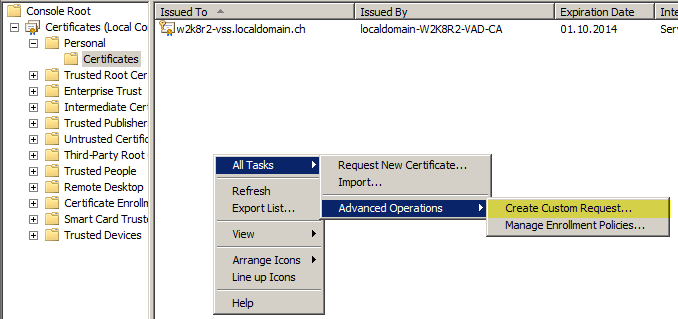
Browse to Personal -> Certificates, right-click in the right hand space and choose All Tasks -> Advanced Operations -> Create Custom Request…
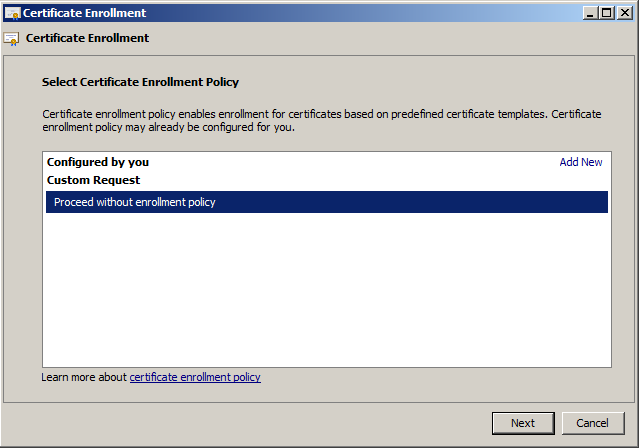
Select “Proceed without enrollment policy” – as we’re not attached to AD, we most likely have no other choice.
Here comes the first important step; select “Legacy Key” in the drop-down!
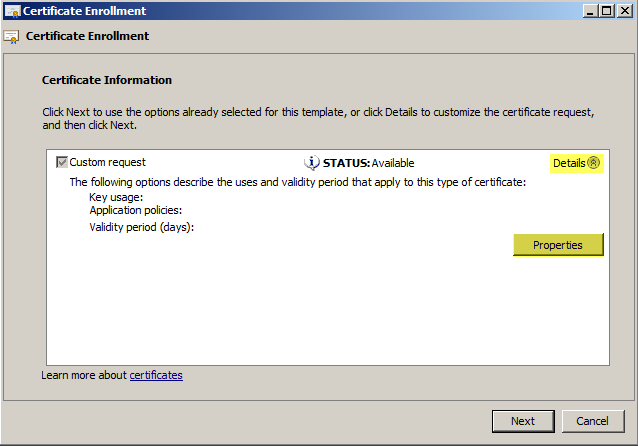
I skip screens with nothing to modify on them. Next up is the Certificate Information screen, expand the drop-down and click “Properties”.
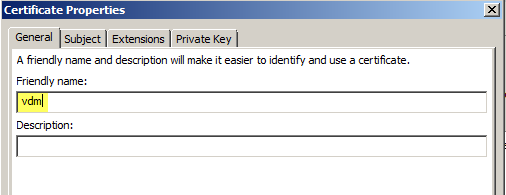
Now insert the “Friendly Name” ‘vdm’, as described in the Installation Guide – but you knew this, didn’t you?
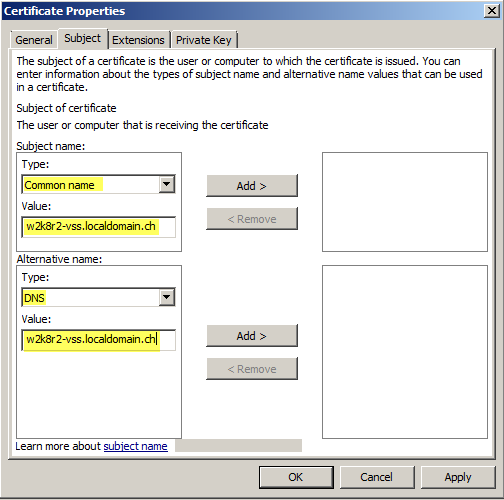
Important point now; add the FQDN of the external URL to the Common Name and the Subject Alternate Name (‘DNS’ field).
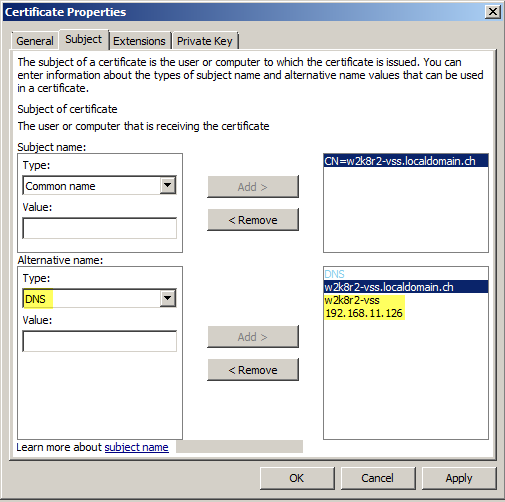
Add any other names, short host name, IPs maybe internal name of the box to the DNS/SAN field.
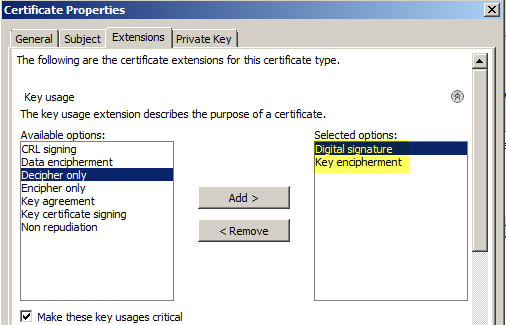
Switch to “Extensions” and expand “Key usage”, add ‘Digital signature’ and ‘Key encipherment’.
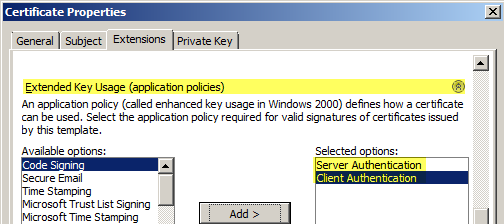
Scroll down, expand “Extended key usage” and select ‘Server Authentication’ and ‘Client Authentication’.
Switch to the “Private Key” tab, expand “Key options” and set “Key Size” to 2048, and most importantly, select “Make private key exportable”.
That’s it! Click next and finish the wizard, by saving your request (format doesn’t matter). Feed it to your Certifcation Authority (CA) of choice, install intermediate and root certificates as needed (if you didn’t already) and (re)start your View services.
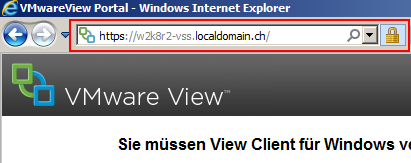
When you browse to the FQDN of your View Security Server, you should see that IE does not complain about the certificate anymore.
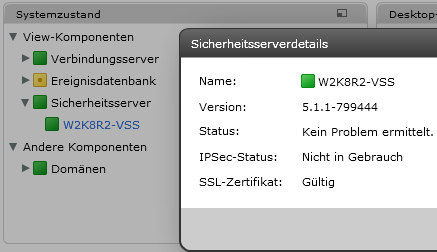
And the status in the View dashboard should go green. Congrats!
As I mentioned at the beginning, there will be certainly trouble accessing the Certificate Revocation List (CRL) if the certificate is issued in a AD CA, specially by a View Security Server, which resides normally in the DMZ, so you might have to disable CRL checking as per VMware KB article.


